Label/Tag & Coverage passes – LabelExtractor
This is an old article from the end of 2006. It’s partially outdated, but still contains interesting info. More than that, there’re a lot of links to it from other places, so, since I’m closing the site it was on ’till today, I’ve decided to add it as a backdated post here.
Chapter I. Basic methods of getting color masks
Chapter II. Basic methods of color masks usage
Chapter III. Label/tag & coverage passes in mentalray
Chapter IV. Usage of Label/tag & coverage passes
Chapter V. Macro LabelExtractor
– Download macro LabelExtractor –
Chapter I. Basic methods of getting color masks
A wish to correct an image rendered in 3D package without rerendering – in compositing application – is pretty often. Slightly change the color, blur shadows, intensify specularity and all that stuff. But if you need to do this for a speciefic object – it usually evolves into rotoscoping or mask painting. And if you need to correct all metallic elements in the scene or a character’s clothes? And if it’s animation – a car drives along tricky trajectory, character’s clothes deform and swing? Rotoscoping becomes a pain in the ass.
Well, for this purpose there’s old method – assign plain colors to your objects (or groups of objects by some kind of criteria) and you’ll get a rendered image with simple color regions, representing accurately objects (or groups of objects) in you scene. Then in the compositing software you can extract just the region you need and use it as a mask for further operations. For animation you’ll get a whole sequence of accurate masks. Obviously, this reduces time and work greatly.
This could be accomplished pretty simply – just assign special shader, that isn’t affected by illumination, shadows and other scene elements. In Maya the most obvious choice is Surface Shader.
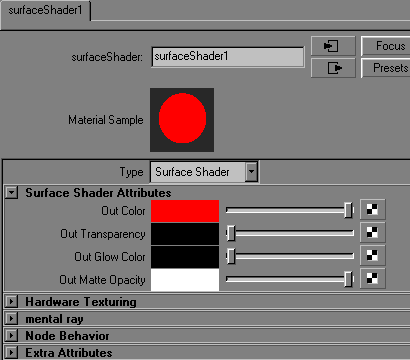
There’re other ways to get the same result:
Simple black Lambert with colored Incandescence (and any other blinn, phong, anisotropic and others with the same settings):
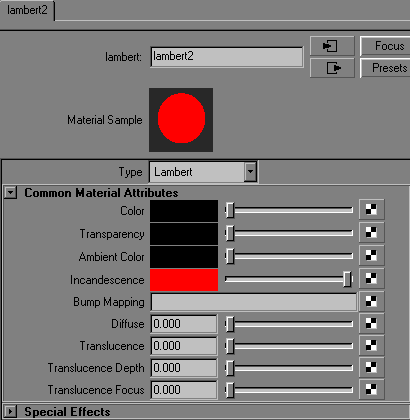
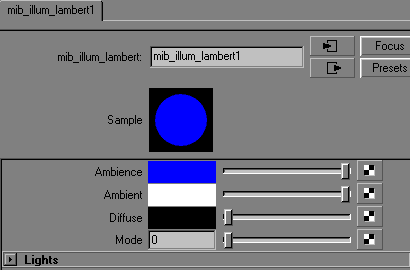
The same thing with mentalray shaders – with standard shaders:
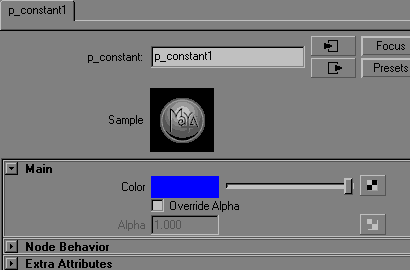
…or surfaceShader-like mentalray analog – constant shader (in this case – p_constant from p_shaders package):
For example, we decided to make all cubes red, all spheres blue and all toruses green:
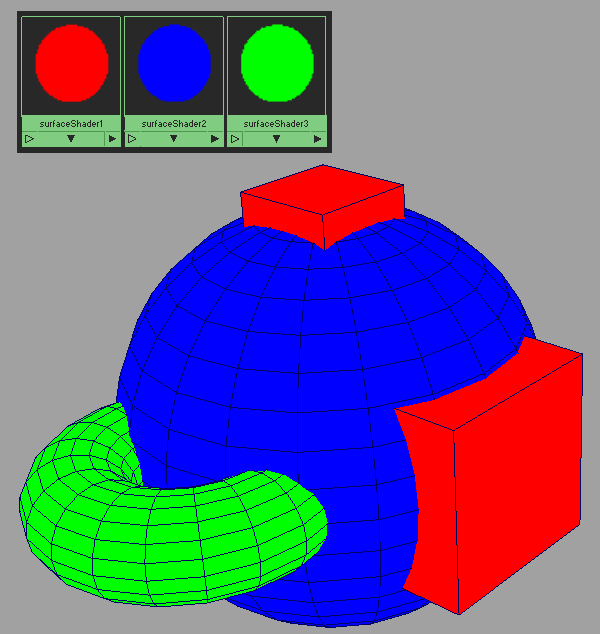
Ready for rendering. But that way after each beauty render of the scene itself we need to render it once more to get masks pass. Though these shaders do render pretty quick, but there’s a natural desire to set up a scene, press render and get everything altogether. For this you can use special shaders for mentalray that while rendering the scene just once are able to write framebuffer’s in separate files – p_megaTk from p_shaders package or ctrl_buffers:
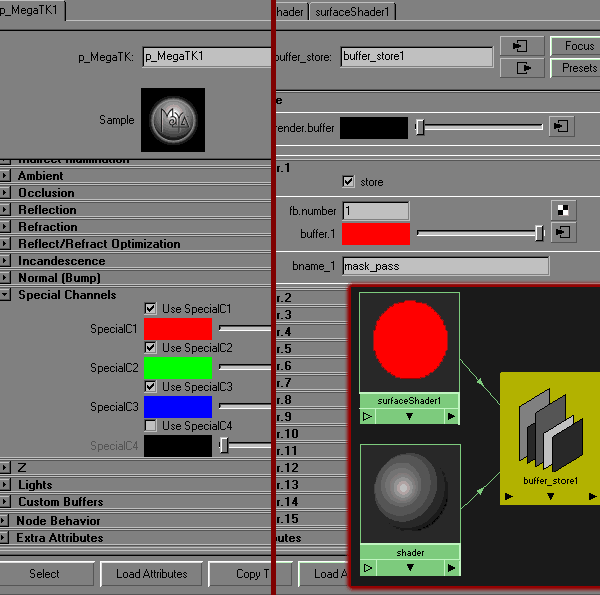
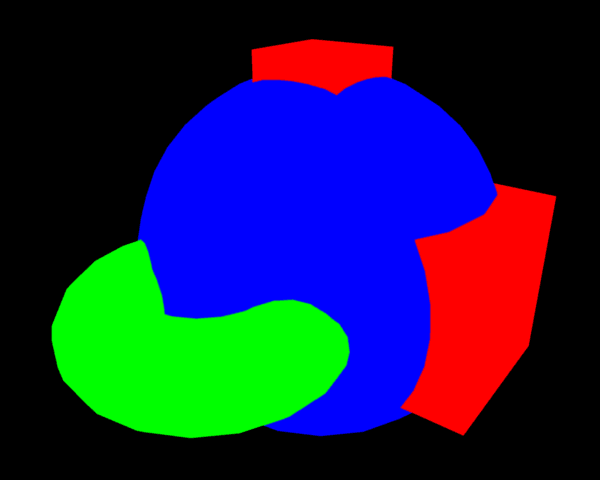
Anyway, we’ve got the same result – colored regions with anti-aliasing.
Chapter II. Basic methods of color masks usage
Since masks are ready, we need to figure out how to use them.
In the most cases we deal with RGB images. Obviously, it’s better to use these three colors for masks – that way their separation would be the easiest:
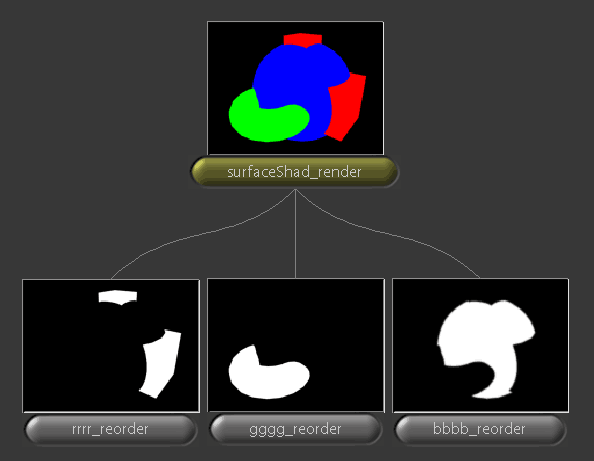
But three masks are often not enough – to get more, we need to render another rgb pass or to add secondary colors – CMY. Separation becomes somewhat more complicated and anti-aliasing – rougher, but now we have up to 6 masks (all nodes in the lower row are ColorX with following expressions in alpha channels):
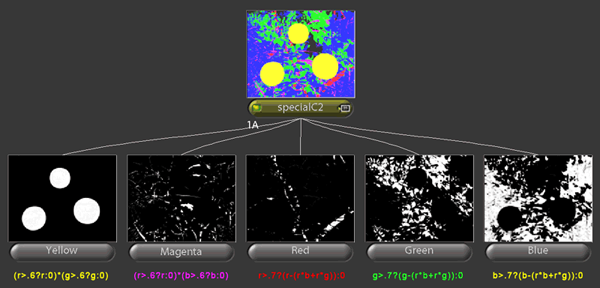

Now, using extracted regions, we can handle necessary corrections of rendered image in compositing application.
Chapter III. Label/tag & coverage passes in mentalray
There’s two passes specially for this purpose in mentalray – label/tag & coverage. First one assigns a constant color to the object based on the value of a specific custom attribute – miLabel. Second one – separately stores anti-aliasing data, but only in those contours, where objects with different miLabel values occlude (or when object occludes emptiness). That means if two objects with the same miLabel value occludes one another – coverage doesn’t write aa-data in this place.
The technique in this case is like this:
1) create integer attribute miLabel for transform-node or for shape-node of the object:
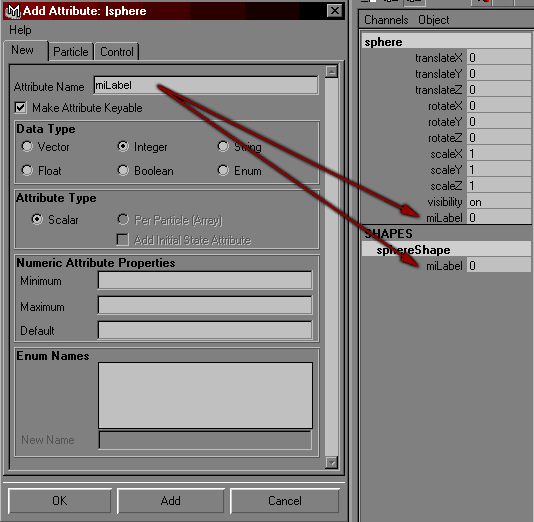
2) set the value – from 1 to infinity (or almost infinity :)) as you need – objects with the same values will form a group
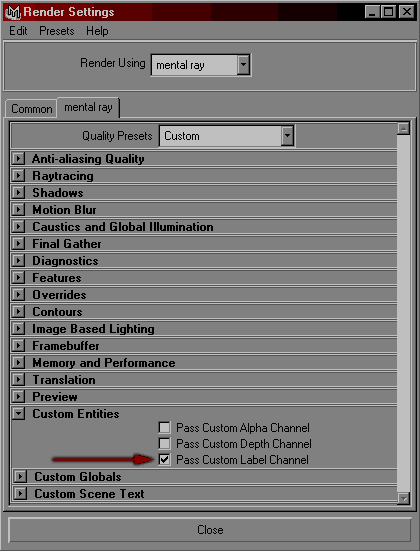
3) if you want to read attribute from shape-node – enable Pass Custom Label in mentalray globals. If from transform-node – it should be disabled:
4) and create passes for label/tag & coverage in the attributes of camera you’ll render your scene through:
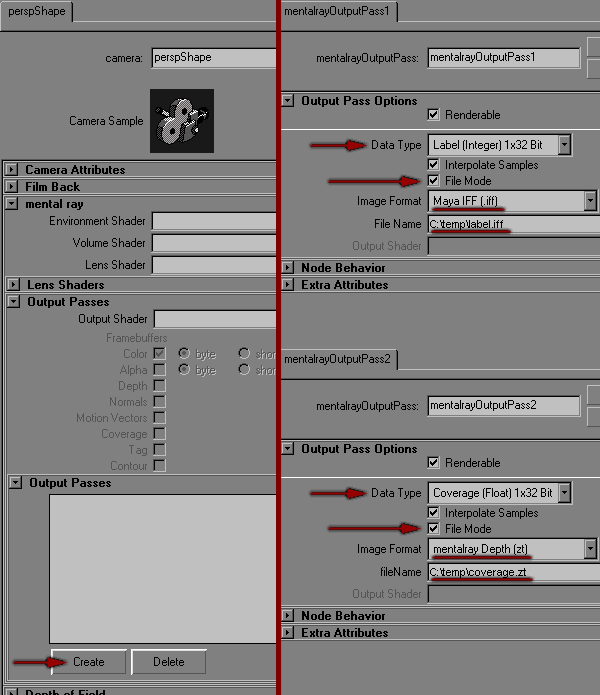
Actually, it’s supposed that you render label/tag pass in ‘mentalray Tag (tt)’ format, and coverage – in ‘mentalray Alpha (st)’. But for some reasons accurately these two formats aren’t supported by Shake. But if you set another one – mentalray will try to adapt it’s data for channels of this format. For Shake the best ones I’ve found – iff (for label/tag) and zt (for coverage) – during the rendering there will be a warning, but everything will be ok as the result. Then you need only to plug your zt in reorder (code zzzz0, for example) and to use it.
As I’ve already said, any value for miLabel will do. But it’s just more convenient to start from 1 and move incrementely. If there’re a lot of objects in the scene and you don’t want to prepare each one by hand, you can use this script (source it and just use one of two precedures – script will create miLabel with increment values for each object):
//-----------------------------------------------------------------------------
//miLABEL ALL SHAPES

global proc sag_tagShapes() {

select -cl;
select -adn;
int $i=1;
string $objShapes[] = `ls -sl -type geometryShape`;

for ($curObjShape in $objShapes) {
	string $objType = `objectType $curObjShape`;

	if ($objType == "mesh" || $objType == "nurbsSurface" ||
							$objType == "subdiv") {
		addAttr -ln miLabel -at long -k 1 $curObjShape;
		setAttr ($curObjShape+".miLabel") $i;
		$i++;
	}
}
}

//-----------------------------------------------------------------------------
//miLABEL ALL TRANSFORMS

global proc sag_tagTransforms() {

select -cl;
select -adn;
int $i=1;
string $objShapes[] = `ls -sl -type geometryShape`;

for ($curObjShape in $objShapes) {
	string $objType = `objectType $curObjShape`;

	if ($objType == "mesh" || $objType == "nurbsSurface" ||
							$objType == "subdiv") {
		string $curObjParent = `firstParentOf($curObjShape)`;
		addAttr -ln miLabel -at long -k 1 $curObjParent;
		setAttr ($curObjParent+".miLabel") $i;
		$i++;
	}
}
}
//-----------------------------------------------------------------------------
If you use mentalray standalone, you can render label/tag & coverage (and all native mentalray passes) much more easily with m2mr script.
Chapter IV. Usage of Label/tag & coverage passes
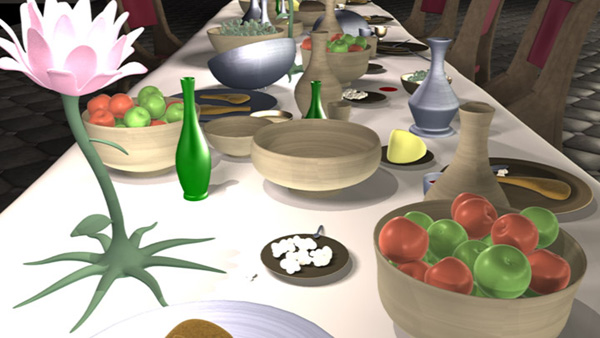
For example here’s a frame from my recent project. That’s a beauty pass right out of the render.
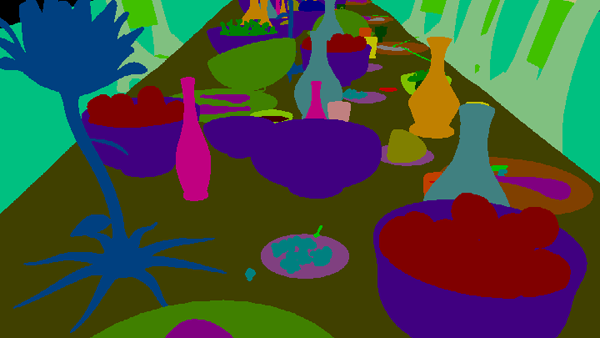
Corresponding label/tag pass where I grouped under same labels similar objects (in the end I had about 30 different colors):
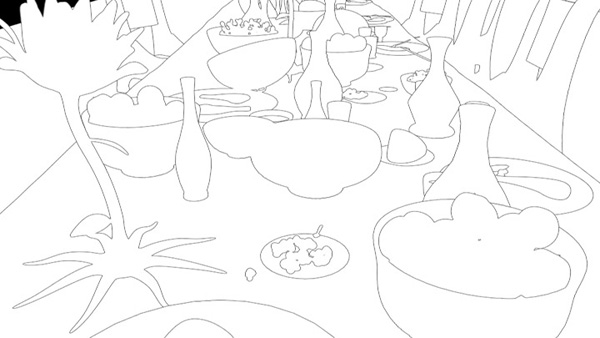
and coverage pass with anti-aliasing data:
Now I can change things for specific objects (of course I can modify not only beauty pass, but anything – specularity of bottles, for example, masking 32-bit specular pass). But we need to extract only specific color regions. It could be done via different keying tools or via ColorX with an expression, that sends pixels of specified color into alpha channel. For example:
floor(r*256)==64&&floor(g*256)==0&&floor(b*256)==128?1:0It’ll extract all blue bowls on the table (by default values of channels aren’t very clean, so I’m making a conversion in familiar 8-bit values and round down each channel – floor(r*256) and so on) Now we need only to crop our mask with coverage (for example, Inside or IMult) and we can use it.
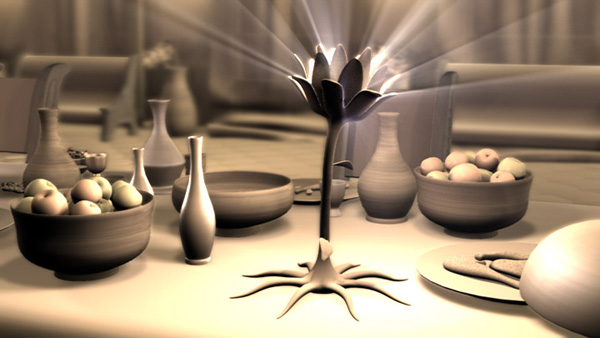
This is the final composite (well, not of the frame shown above, but very similar anyway :)) – using these methods I blured shadows, made a slight tint to apples, something like DOF for a back wall, separation of the flower bud for RBlur and a number of other things (that I just don’t remember already).
Chapter V. Macro LabelExtractor
Well, after explaining all these things, I can describe the usage of my macro LabelExtractor at last 🙂 It simplifies the process of separation of color regions mentioned above. And gives the ability to extract them by numbers, specified in miLabel attribute in Maya.
It could be done in one of two ways – by this label number (corresponding to miLabel in Maya) or by just clicking on the actual region in the viewer.

If useColor is active – calculations use color of pickColor. If it’s inactive (by default) – labelNum is used.
If you want to click in the viewer – activate useColor, click on pickColor swatch (yellow border should appear) and click on the region you want to extract – you’ll get it separated into labelExtractor’s alpha channel.
I had a list of objects’ labels in Maya, consistent through several shots. So I just entered them into labelNum and didn’t bother about clicking 🙂 That’s why labelNum is default method. The problem is – I couldn’t figure out a universal formula which mentalray uses to convert miLabel integer value into fixed color values – I’ve made only limited to 1-63 label numbers expression. Anyway, ’till now I had maximum of 30-35 labels in one scene, so that’s not a big problem really. pickColor works with any label numbers – no limits.
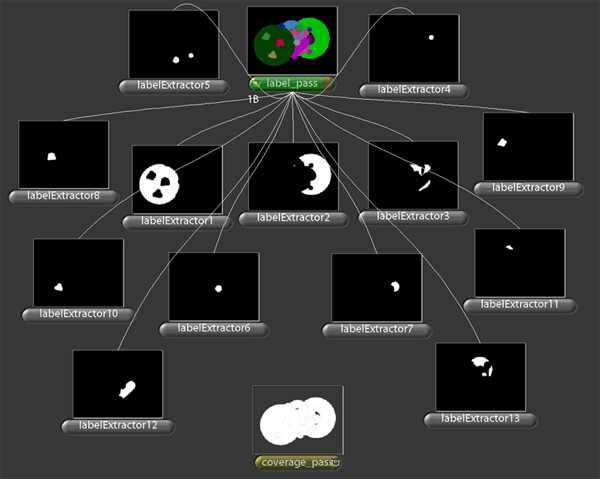
Test files are included in the archive:
– Download macro LabelExtractor –
In: Render · Tagged with: aliasing, alpha, anti-aliasing, Compositing, coverage, ctrl_buffers, expression, framebuffer, labelExtractor, m2mr, macro, mask, maya, mentalray, miLabel, p_constant, p_megaTK, p_shaders, pass, script, shading, shake, st, surfaceShader, tag, tt, zt

on 16 December 2009 at 17:33
Permalink
This is a great tutorial that i have referred to many times. Thank you soo much.
I have a question that I have never been able to resolve, and perhaps its because I misunderstand your tutorial.
I am using photoshop for compositing still 3D images, and I make use of the label/coverage technique to photo-retouch and color correct one element at a time.
Anyway, my problem is that I have noticed at high zooms that the label always represents less pixels than the object in the master-beauty, and so I do not quite understand how to combine all the pixels from the label, along with the coverage to make a smooth edge for that element, that actually covers all the pixels that that element is represented by in the master-beauty pass. No being to do this is always leaving me with about 1 pixel width of pixels that are contrasting in color on the edge of the objevct and are noticeable to the eye. I would appreciate any insight you might have on this…
many thanks
wiss
on 17 December 2009 at 20:20
Permalink
Yeah, I want to make a post on how to use these passes for masking in compositing for a pretty long time already… I’ll do it eventually 🙂
Anyway, the trick is – label pass shows the object that contributes THE MOST to the particular pixel and coverage pass shows exactly how much. So, in the anti-aliased edges when object’s contribution becomes fainter than 0.5 – label and coverage switches to the object behind. That way it’s obvious that label shows as the object with just a half (>0.5) of it’s anti-aliased fringe and coverage is ranging 1.0-0.5 for this object and then raises up to 1.0 again for the one behind it.
So, what you need to do is:
1) get your hard mask from label pass;
2) get an outline around it (dilate/expand with one pixel should be enough) and multiply this outline by inverted coverage – that way you get those faint anti-aliased pixels you lack;
3) multiply hard mask from label by coverage and add/plus pixels from the step 2 – and you’ve got a pretty similar result compared to standard RGBA masks.
It’s pretty easy to do in any node-based compositing package, though it could be tricky to use in Photoshop.
P.S. If you make this in Nuke, you’d want to gamma up your coverage from the start.
on 20 December 2009 at 12:24
Permalink
You are the man!
I actually am doing the same thing as you describe above, but honestly I thought it was a “hack” and not the correct way to handle the passes.
I was only using photoshop to simulate what I ultimately need to do in a Adobe Air application in realtime. I wanted to understand it first, so I could code it properly. Now to figure out how to dilate the coverage by one pixel ! 😉
Again, thank you soo much for your original article and for your reply!
wiss
on 21 December 2009 at 13:46
Permalink
You’re still the man, but … I’m still having problems. Can I send you an example label/coverage set-up to show you?
The issue is that when using this method, some of the edges of the hard mask (after going throug the process) are treated properly and anti-aliased succesfully, whereas other edges remain outside of the reach of the label pass (even after reasonable dilation), thereby being left untreated and “hard” by the process!
Its driving me up the wall! Feel free to send me an email on my address if you’re willing to have a look.
tx
on 5 January 2010 at 12:30
Permalink
How it works in combination of XSI and Shake?
on 5 January 2010 at 16:48
Permalink
I don’t know XSI, sorry. In mi file miLabel attribute adds a line ‘tag #’ in object’s instance block:
instance “pSphere1” “pSphereShape1”
light “exclusive” []
material [“initialShadingGroup”]
tag 1
caustic on
…
And you need just to output both buffers in camera block:
framebuffer “buff1”
datatype “coverage”
filtering on
filetype “tif”
filename “coverage.tif”
framebuffer “buff2”
datatype “tag”
filtering on
filetype “tif”
filename “label.tif”
Don’t know whether this is useful for XSI though.
on 7 January 2010 at 4:09
Permalink
thanks for the response, Actually I am not very good (and I am lazy)in technical issues and I want to find an easy way such as the one that RPF format is doing for max users , as you now this format can save all data such as UV ,depth , object and Render id , coverage and etc. and then combustion can read them in a very easy way .just you need to load the RPF image and apply a 3d filter and mask the specified object based on its id (not rgb) …any chance for Maya and XSI users to have a format like this?
I don’t think exr can save object label information as integer id (am I wrong?)
any plugin for shake that can load tt file not only to load its RGBA data but also to load its integer data that it saves?
thanks for your response
on 7 January 2010 at 17:45
Permalink
Yeap, I’ve found no way to output label as integers to be able to use it in comp (old shaders_p did that as well as I remember – with it’s own openexr writer). Shake supports custom channels from version 4.0, I think, but not tt. Maybe .map file would do – it’s supported by shake and, I suppose, it can store tag data. imf_copy to convert tt into map. You need shake 4.x anyway though to try it.
on 31 March 2010 at 16:02
Permalink
Скажи а если маски по цвету вышли с гребенкой то coverage пасс используется для anti-aliasingа? Как это потом сложить в композе?
со Fusion ты работаешь?
on 1 April 2010 at 22:23
Permalink
Если под “гребенкой” подразумевается отсутствие анти-алиасинга, то да. Как это вытягивать в композе написано тут же в комменте #2, правда на английском. В кратце – нужен каверадж в пределах лэйбла и еще остатки вокруг этого лейбла – за его пределами. Я постараюсь в эти выходные сделать статью о том как это собирать – давно уже собираюсь.
С Fusion не работаю, но человек воссоздал в нем мой нюковский сетап по этому делу – думаю добавлю его к статье.
on 30 June 2010 at 17:31
Permalink
Когда же уже будет продолжение статьи? (о том как собирать + сетап для Fusion)
on 2 November 2010 at 11:52
Permalink
hey Sagroth,
thanks for the nice tut, do u have any idea how to write the same expression in Nuke ?!
on 4 November 2010 at 16:47
Permalink
Not exactly the same, but really similar – here’s the expression node, just copy/paste it into your nuke. You need to activate Tag color swatch in User tab and ctrl-click on the label color you want to pass into alpha:
on 6 November 2010 at 7:38
Permalink
thanks Sagroth ,
it works fine u r the man 🙂
on 16 November 2010 at 8:56
Permalink
You’ve mentioned Fusion, Nuke, and Shake as compositing programs that can be used to run your label extractor macro but you do have a script for a Toxik (Maya Composite) user like myself?
Nuke just keeps getting better and better but until I make the switch I’m stuck with Toxik :/.
Any help on the question would be greatly appreciated.
on 16 November 2010 at 23:04
Permalink
LabelExtractor is shake-only node. Anyway, the same thing could be done in any compositing software (no doubts it applies to Toxic, though I’ve never used it). You just need to extract a solid color from label pass and multiply it by coverage. For a better anti-aliasing you need to add inverted coverage one pixel around selected label color (I’ve explained that in one of the comments above – #2). So, you just need to make these steps with toxic tools and that’s it.